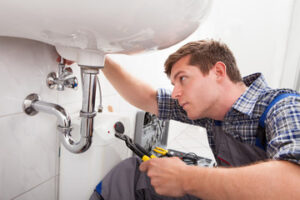
Plumbing is a demanding career that requires a lot of hands-on work. It also requires the ability to listen to customers and troubleshoot their problems.
Plumbing brings water into your home and removes wastewater, while process piping moves chemicals, gasses, and other fluids throughout a facility. Both serve important purposes, and both can be subject to the same problems like leaks, breaks, and clogs. Visit https://freedomplumbingnj.com/ to learn more.
Piping is the network of pipes used to transport fluids in industrial applications. It may carry water, oil, natural gas, chemicals or steam. It is also used to connect equipment such as pumps, compressors and heat exchangers. Pipes can be made from a variety of materials including copper, steel and stainless steel. Pipes can be seamless or welded and they can be round, square or rectangular in shape. They can also have different wall thicknesses and diameters. Piping systems are used in a variety of industries, such as semiconductor, paper processing, oil and gas refining and pharmaceutical manufacturing.
Plumbing is the type of piping that most people are familiar with, as it’s used to transport water in homes and commercial buildings. It is typically installed behind walls and underneath floors. It can be made from a variety of materials, but the most common is copper. Piping is also often used in fire sprinkler systems and can transport non-potable water, sewage or other fire-suppression fluids.
While there are some similarities between piping and plumbing, the main difference is their intended purpose. A plumbing system is designed to transport water into facilities and provide safe drainage for wastewater. A piping system transports gases, chemicals, water and other fluids throughout a facility during the manufacturing process.
The differences between piping and plumbing are further illustrated by the different standards and requirements that they must adhere to. For example, the building codes that apply to plumbing are significantly more stringent than those that apply to piping. Additionally, the piping design and installation processes for different types of fluids differ.
The specifics of plumbing regulations vary by province or territory, but they generally require that plumbers be licensed and must follow strict guidelines to ensure that their work meets minimum standards. This includes the use of certified materials and upholding the health and safety of consumers. In addition, there are additional regulations that must be followed when working on potable water systems, such as ensuring that drinking water is not contaminated and that waste is properly disposed of.
Commercial Plumbing
As its name suggests, commercial plumbing is the branch of the plumbing industry that deals with businesses and large buildings like offices, shopping malls and high-rise apartments. While both residential and commercial plumbing have some overlap, the main difference is that commercial plumbing serves a much larger clientele than residential plumbing. This means that commercial plumbers are likely to deal with more complicated plumbing systems and a wider range of problems than their residential counterparts.
The plumbing systems in commercial properties tend to be bigger and more complex than those found in homes, as they have to serve a wide range of different occupants. They also have to abide by stricter health and safety regulations, which can sometimes require more sophisticated or extensive equipment than would be necessary in a home. Because of this, commercial plumbing can be more difficult and time consuming to repair than residential plumbing.
A commercial plumbing company is often hired to work on new construction projects as well as to maintain or repair existing systems. These projects may include installing or upgrading pipes, fixtures and other components in restaurants, hotels, shopping centers and other large business or commercial properties. These projects may involve a variety of different types of pipe, including copper, PVC and steel. A professional commercial plumber should have a good understanding of all these different types of pipe and fittings, as they will be required to install or replace them in many different situations.
Another important aspect of commercial plumbing is dealing with higher usage rates. While this is not always a bad thing, it does mean that there is a greater risk of wear and tear on fixtures and appliances. This can lead to a need for more frequent maintenance and repairs, which in turn can result in higher operating costs for the property.
There are a lot of stereotypes about plumbers, but the truth is that they are generally intelligent and highly trained professionals. Most plumbers have at least a high school education and often complete more advanced training programs and apprenticeships in their field. These programs can lead to industry-recognized certifications, such as the National Council of Plumbing Examiners (NCPE) Certificate of Achievement. Regardless of the level of education and experience, all plumbers should be familiar with local building codes and regulations in their area.
Residential Plumbing
Residential plumbing encompasses all of the pipes, sinks, and water-dependent appliances in homes. It covers a wide range of services, including installing and repairing water heaters, identifying leaks, and maintaining faucets and toilets. This type of plumbing also involves rerouting pipes when renovations or extensions are being done to a home. Some plumbers specialize in this type of work, while others may focus on commercial or industrial plumbing.
The main difference between residential and commercial plumbing is the scope of each job. Commercial plumbing is a broad field that can include anything from hospitals, restaurants, and retail stores to warehouses, office buildings, and even prisons. Because of this, commercial plumbing jobs tend to be larger and more complex than their residential counterparts. Commercial plumbers must have a wider variety of skills in order to tackle these projects successfully.
Leaks are one of the most common problems in residential plumbing. These can occur in a number of ways, including from worn-out seals, loose connections, or blockages. These issues can lead to major damage if not addressed promptly. It is important to find a quality plumber that can address these issues quickly and efficiently.
Another issue that residential plumbers often face is clogged drains and sewer lines. These can be difficult to fix and may require the use of power tools or chemicals. Plumbing companies that offer residential plumbing services usually have a team of experts who can handle these issues effectively.
As with any type of plumbing, regular maintenance is important for both residential and commercial locations. This can help prevent leaks and other problems from occurring, as well as extend the lifespan of fixtures and pipes. In many cases, regular maintenance can be performed by the homeowner, but in some instances, it may be necessary to hire a professional.
A career in plumbing can be very rewarding, especially if you enjoy working with your hands and have a knack for problem-solving. There are a number of different ways to get into the plumbing industry, including going through a formal apprenticeship program or earning a certification from a trade school. Once you have the necessary qualifications, you can begin looking for jobs in your area.
Plumbing Permits
As with any plumbing job, it’s always best to consult the local rules and laws regarding permits. Some cities require certain types of plans that must be approved before the permit is actually issued, while others may have other requirements like a certification from a licensed plumber. Typically, you will need a permit when any installation, modification, repair, or extension is done to water piping and wastewater drainage systems. This includes any commercial plumbing work as well.
When do you need a permit? This depends on a lot of factors including the type of work being performed and the location. A home owner might need a permit to change a toilet or install a new sink, but you will definitely need a permit for any type of major project like installing a new kitchen or bathroom or changing the existing piping. A commercial plumbing contractor will need a permit whenever they are performing work on a system that will affect multiple residential or commercial units.
In some cases, a permit might also be needed for any work on fire lines. This is especially true if you’re working in a high-rise building. The plumbing inspection department will determine if you need a separate fire permit or if the general plumbing work can be covered under a single general construction permit.
A plumbing permit is not required for ordinary minor repairs, replacements, or clearances. It is also not necessary if the plumbing work is carried out by a general contractor under a single building permit.
However, if the plumbing work involves connecting to a gas line, an asbestos inspection (not necessarily abatement), and/or a full electrical permit will be required. The process for obtaining an LAA permit can take up to eight weeks and can be further extended during winter months. To speed up the process, there are special express applications that can be filled out to obtain an LAA plumbing permit and the related paperwork within a day. A notice of commencement will be used to officially announce that the plumbing work is about to begin.